
Ever since I shared my Brother ScanNCut on Instagram, I’ve been asked the same question several times:
Why did you choose the Brother ScanNCut over Cricut or Silhouette?
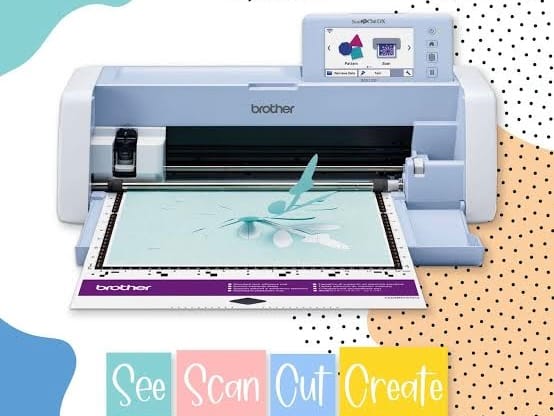
After researching the available options and comparing features, I eventually decided to treat myself to a Brother ScanNCut SDX1000. This isn’t a head-to-head comparison written by someone who owns all three machines. I have only owned the ScanNCut. However, I spent a lot of time researching Cricut and Silhouette before making my purchase, and after a couple of years of using the ScanNCut, I can confidently say I would make the same choice again.
Why I Wanted an Electronic Cutting Machine
Unlike many crafters who buy cutting machines primarily for paper crafts or vinyl projects, I bought mine as a companion to my sewing machine. As a bag pattern designer, I spend a lot of time cutting fabric, cork, foam, interfaced fabric, vinyl, and heat transfer vinyl (HTV). Before I owned a cutting machine, my process looked like this:
- Print the pattern
- Cut out the paper pattern pieces
- Pin them to the fabric
- Trace around the pattern
- Cut everything by hand
When you are making bags with multiple pockets, straps, tabs, gussets, and curved pieces, that can involve a lot of repetitive cutting. I was also dealing with wrist pain and wanted to reduce the amount of hand cutting I was doing. I didn’t buy a cutting machine to make crafting faster. I bought it to eliminate as much hand cutting as possible so I could spend more time sewing and less time aggravating my wrists.
Why I Chose the Brother ScanNCut over Cricut
1. The Auto Blade Eliminates Guesswork
The biggest reason I chose the ScanNCut was the Auto Blade feature. I regularly cut:
- Interfaced fabric
- Cork
- Foam
- Vinyl
- Heat transfer vinyl
I didn’t want to constantly ask myself:
- Which blade should I use?
- What blade depth should I set?
- What pressure setting should I use?
- Which mat should I use?
During my research, I frequently came across discussions from Cricut users asking questions about material settings, blade depths, and mat choices. With the ScanNCut DX series, the machine automatically detects material thickness and adjusts accordingly. For me, that simplicity was worth a lot. Instead of spending time experimenting with settings, I can load the material, send the file, and start cutting.
2. One Blade for Multiple Materials
One thing I love about the ScanNCut is that I use the same blade for almost everything. Whether I’m cutting cotton fabric, cork, foam, HTV, or vinyl, I don’t have to keep switching blades or wondering if I have the correct setup. For someone who works with many different materials, that simplicity is incredibly convenient.
3. One Mat Works for Most of My Projects
Another benefit is that my workflow is simple. For the materials I use most often, I’ve been able to work with a single standard mat rather than maintaining multiple specialty mats. Less equipment means fewer decisions and lower ongoing costs. That may not sound exciting, but it makes day-to-day use much more enjoyable.
The Feature I Didn’t Expect to Use So Much: The Built-In Scanner
When people talk about the ScanNCut, they often focus on the scanner’s ability to scan drawings and create cut files. While that’s useful, I use the scanner for something entirely different. I use it to reduce material waste. As a bag maker, I often work with materials like cork, vinyl, foam, and specialty fabrics that aren’t cheap. After cutting a large pattern piece, I’m often left with irregular scraps that are too good to throw away but difficult to use efficiently.
The built-in scanner allows me to scan those leftover pieces and see exactly where the usable material is. I can then position smaller pattern pieces inside those areas and cut them accurately rather than reaching for a fresh piece of material. The scanner area on the SDX1000 is limited to 12″ x 12″, but that hasn’t been a problem for the way I use it. Most of the time, I’m scanning scraps and offcuts so I can fit smaller pattern pieces into them. Over time, that can save a surprising amount of material.
Accurate Cuts Make Better Bags
One thing I didn’t fully appreciate before buying the machine was how much difference accurate cutting makes. When cutting by hand, achieving perfectly smooth curves can be difficult, especially if you’re dealing with wrist pain. The ScanNCut consistently produces clean, accurate cuts. As a bag pattern designer, I notice this during assembly. Pattern pieces fit together more accurately, which makes construction easier and produces cleaner results. My pattern files are created digitally, so they’re already precise. The ScanNCut helps maintain that accuracy all the way through the cutting process.
My Digital Workflow
I create my bag patterns digitally using Affinity Designer and other CAD based softwares. Most of my patterns are exported as SVG files, which I also provide to customers. My workflow is straightforward:
- Design the pattern
- Export as SVG
- Send the file to the ScanNCut via WiFi
- Cut the pieces
With the ScannCut, there is no need to:
- Print paper templates
- Cut out paper pieces
- Pin them to fabric
- Trace around them
- Cut everything by hand
Instead, I can prepare my material, load it onto the mat, send the file, and move directly to sewing.
Real Projects Where the ScanNCut Shined
Cutting Foam
One of the materials that impressed me most was foam. The machine automatically determined how many passes were needed based on the thickness of the foam and produced perfectly sized pieces. I didn’t need to perform multiple test cuts or spend time adjusting settings. This is where the Auto Blade really proves its value.
Cutting Intricate Heat Transfer Vinyl Designs
I also use the machine for heat transfer vinyl. One of my favourite projects was creating a Star Wars design for a Wayfarer Sling Backpack I made for my husband. The design included intricate details that would have been extremely difficult for me to cut by hand. The finished result looked professional and reminded me why I invested in a cutting machine in the first place.
Learning Curve and Community Support
I personally found the ScanNCut easy to learn. That said, I’m an engineer and generally comfortable with technology. Whenever I needed help, I found an enormous amount of support online. There are:
- Facebook groups
- YouTube tutorials
- Tips and hacks from experienced users
- Step-by-step project videos
If I wanted to learn something new, someone had usually already created a tutorial for it. That made the learning process much easier than I expected.
Maintenance Has Been Easier Than Expected
Like any cutting machine, the cutting mat eventually develops cuts and loses some stickiness. Fortunately, there are plenty of maintenance tips available online. I’ve successfully cleaned and refreshed my mats to extend their lifespan. I’ve also learned small tricks over time, such as:
- Some fabrics stick better depending on which side is placed on the mat
- Masking tape can help secure certain materials like vinyl
A little experimentation goes a long way.
The Biggest Limitation
No machine is perfect. For me, the biggest limitation is the cutting size. The SDX1000 is limited to a maximum of 12″ x 24″ cutting area. For most of my bag patterns, this isn’t a problem. However, if you regularly need to cut very large pattern pieces, you may want to compare larger-format machines before making a decision.
Availability and Support Influenced My Decision
One factor that many comparison articles don’t discuss is after-sales support. When I was researching machines in India, I discovered that I could purchase the Brother ScanNCut through a dealer and speak to someone directly if I needed assistance. At the time, Cricut machines were primarily available through online stores. Knowing that local support and servicing options existed gave me additional confidence in my purchase.
Was It Worth the Money?
Absolutely. When I compared prices, the ScanNCut and Cricut were fairly close. The ScanNCut may have cost slightly more, but not enough to influence my decision. For me, the value comes from:
- Reduced wrist strain
- Accurate cutting
- Less material waste
- Fewer setup decisions
- A simpler workflow
The Auto Blade alone eliminates a lot of frustration. I can load the material, send the file, and cut. No guessing. No constant setting adjustments. Just a straightforward workflow that lets me get back to sewing.
Would I Recommend It?
Yes, especially if you’re a sewist, quilter, bag maker, or someone who works with a variety of materials. I would still encourage anyone considering a cutting machine to try the available options in person if possible. The best machine is the one that feels most intuitive for the way you work.
For me, the winning features were:
- Auto Blade
- One blade for multiple materials
- One-mat workflow
- Easy-to-use software
- WiFi connectivity
- Built-in scanner
- Accurate cutting
- Reduced material waste
- Less strain on my wrists
The ScanNCut helped me spend less time cutting and more time sewing. And for me, that’s exactly what a cutting machine should do.